
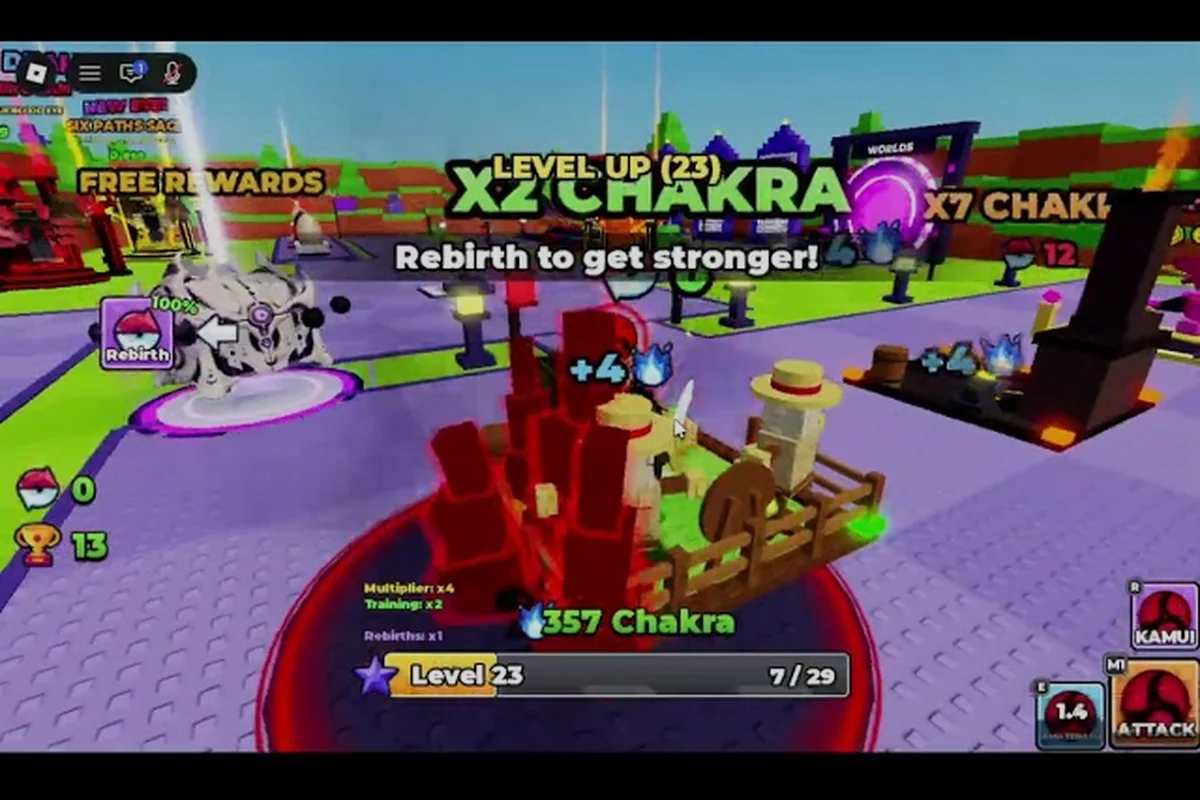
A 1 anime eyes rebirth boost is any confirmed Chakra multiplier that makes the next rebuild faster. The useful discussion is narrower than many guides imply: auras are Chakra multipliers, pets are a confirmed multiplier system, group membership carries a reported +10% Chakra bonus, and rebirth itself grants a permanent multiplier that stacks with later resets.
That is the stack. It does not include group coordination, player count, eye combat skills, or temporary combat effects. This guide explains how those confirmed layers interact, how to measure them, and how to build a rebirth loop that improves with each cycle.
What counts as a rebirth boost
A rebirth boost is a multiplier that increases the Chakra earned during a cycle or improves the permanent gain after a reset. It is not a temporary combat effect, and it does not need to be activated during a fight. In practice, the safest approach is to repeat the same test with one variable changed.
| Boost source | Confirmed role | How it helps a cycle | What to verify |
|---|---|---|---|
| Aura | Chakra multiplier | Raises the rate during training | Current multiplier and active state |
| Pet | Chakra multiplier | Adds another layer if equipped | Pet description and active state |
| Group membership | Reported +10% Chakra | Adds a membership bonus | Whether you are in the group |
| Rebirth progression | Permanent multiplier | Improves every later cycle | Live rebirth panel |
| Offline Chakra | Passive gain | Supports time away | Live earnings panel |
The official game page lists auras, pets, rebirth, and offline Chakra as features. It does not publish a single universal formula for how they combine. Community footage indicates that aura and rebirth bonuses can affect the same Chakra gain, but exact values may vary by platform or version.
What is not a confirmed boost
There is no confirmed group coordination system. The group bonus is tied to joining the Bando Interactive group, not to the number of players present. Do not plan around shared zones or group coordination. There is also no confirmed eye-skill multiplier, aura level system, or pet progression system.
How the confirmed layers fit together
For practical planning, treat the confirmed multipliers as layers applied to your Chakra gain. If an aura raises the rate and the rebirth multiplier raises it again, the combined effect is larger than either alone. You do not need the exact formula to compare two setups; you need a consistent measurement.
| Setup | What is active | How to compare |
|---|---|---|
| Base | No extra multiplier | Record a fixed-session baseline |
| Aura only | One Chakra multiplier | Repeat the same session |
| Aura plus pet | Two multipliers | Repeat again with the same route |
| Aura, pet, and group | Three confirmed layers | Record the combined result |
| Plus rebirth gain | Permanent progression layered on top | Compare after a reset |
Use a fixed-session measurement
Run a five-minute session with the setup you want to test and record the Chakra gained. Change one layer, repeat the same session, and compare. If the gain rises, the layer helped. If it does not, the layer either did not apply or did not address the bottleneck. Do not rely on an invented formula. A community-reported percentage can be a useful clue, but the live game and your own measurement are the authority.
Preparing the stack before a cycle
A multiplier that is not active does not help. Before a training session or a reset, confirm that each layer is actually in place. Keep the result only when it holds across several attempts rather than a single lucky run. Record the before-and-after values in a short note so the next decision rests on evidence rather than memory.
| Pre-cycle check | Action | Failure it prevents |
|---|---|---|
| Aura | Confirm the aura is active and displayed | Missing a Chakra layer |
| Pet | Equip the best available pet | Running with no pet contribution |
| Group | Join the Bando Interactive group if eligible | Missing the reported +10% bonus |
| Training area | Confirm the current rate | Training at a lower rate than expected |
| Rebirth panel | Read the next requirement and multiplier | Resetting without a plan |
Join the group for the membership bonus
The reported +10% Chakra bonus comes from group membership. It is not a coordination bonus, and it does not depend on other players being online. Join the official group before a long session if you want that layer active. That habit matters more than any single number copied from an older guide or a community summary.
Equip the pet, do not just own it
A pet in the collection does not contribute. Confirm that the pet you want is equipped and active. If you are unsure which pet helps, read its current description rather than assuming a rarer-looking pet is always better. If the result does not repeat, revert the change and test a different lever instead of spending more resources.
A rebirth loop you can repeat
A clean loop has four stages: prepare the multipliers, train efficiently, meet the requirement, and rebuild with a plan. The loop is not about pressing the reset button as often as possible. It is about making each cycle faster than the last.
| Loop stage | Action | What to record |
|---|---|---|
| Prepare | Confirm aura, pet, group, and training area | Active layers and displayed rates |
| Train | Run fixed sessions toward the requirement | Chakra gained and time |
| Reset | Read the panel and confirm the cost | Requirement, cost, and multiplier |
| Rebuild | Return to a clearable stage | Rebuild time and new rate |
Do not reset without a rebuild plan
Rebirth resets level and Chakra and keeps Wins. If you cannot rebuild within a reasonable session, the reset will feel slower than the cycle you left. Keep a reserve and decide which stage you will farm after the reset. The goal is a repeatable result, not a perfect run that cannot be reproduced on the next attempt.
Compare cycle length, not just the multiplier
A larger multiplier is useful only if it shortens the cycle. Record the time from reset to the next requirement. If the time falls, the loop is improving. If the time stays the same, another layer may be missing. A short written record also makes it easier to notice when a patch changes the behavior you measured.
Rebirth level chart as a planning tool
A level chart is useful only if it reflects the live game. The reviewed sources do not provide a complete level-to-reward table. The one specific community data point is that the fifth rebirth is reported at level 160. Compare the new result with the old one before buying anything else, because a single change is easier to judge.
| Progression band | Primary objective | Boost focus | Verification |
|---|---|---|---|
| First cycle | Learn the reset loop | One income layer | Live panel |
| Early cycles | Build a repeatable route | Aura and pet | Measure each layer |
| Middle cycles | Improve the rebuild time | Group bonus and training area | Compare cycle length |
| Fifth rebirth | Reported level 160 case | Stack every confirmed layer | Read the live panel |
| Later cycles | Reduce downtime | Permanent multiplier plus income | Record your own values |
Record your own dashboard
Track at least five values for each cycle: starting level, ending level, elapsed time, active multipliers, and Chakra gained. That record is more useful than a copied chart because it reflects your account, your route, and the current version. This keeps the advice useful even after a balance update changes a price, a requirement, or a displayed multiplier.
| Cycle | Start level | End level | Time | Active layers | Main observation |
|---|---|---|---|---|---|
| 1 | Your result | Your result | Your result | Aura | Baseline |
| 2 | Your result | Your result | Your result | Aura and pet | Did the pet help? |
| 3 | Your result | Your result | Your result | Plus group | Did the bonus apply? |
| 4 | Your result | Your result | Your result | All confirmed layers | Is the cycle shorter? |
The table is a template, not a set of published values. Fill it from your own sessions. Use the live interface as the final authority whenever an older summary disagrees with what you can see. In practice, the safest approach is to repeat the same test with one variable changed.
Group bonus without coordination assumptions
The group bonus is one of the most misunderstood parts of the game. The official description says joining the Bando Interactive group grants +10% Chakra. It does not describe a coordination requirement, a shared stack, or a bonus based on the number of players in a server.
| Claim | Status | Correct approach |
|---|---|---|
| Joining the group gives +10% Chakra | Reported official feature | Join the group if eligible |
| The bonus depends on other players | Not confirmed | Do not plan around coordination |
| Group size changes the bonus | Not confirmed | Do not chase a full server |
| Group play is required for the bonus | Not confirmed | The bonus is membership-based |
| The bonus replaces training multipliers | No | Use it alongside income upgrades |
The group bonus guide covers the membership path. The rebirth-specific point is that the group bonus is one layer in the stack, not a separate game mode. Keep the result only when it holds across several attempts rather than a single lucky run.
Speedrun planning without unverified shortcuts
A rebirth speedrun is the practice of minimizing the time needed to complete a cycle. The confirmed levers are the same as any other cycle: income, requirement, cost, and rebuild. There is no confirmed shortcut that skips the requirement. Record the before-and-after values in a short note so the next decision rests on evidence rather than memory.
| Speedrun element | What to improve | What to measure | Common mistake |
|---|---|---|---|
| Preparation | Activate every confirmed layer | Active aura, pet, and group | Starting with an inactive pet |
| Training | Use the best measured rate | Chakra per fixed session | Switching routes too often |
| Reset | Read the requirement and cost | Eligibility and multiplier | Resetting without a rebuild plan |
| Rebuild | Return to a clearable stage | Cycle time | Repeating a route that no longer fits |
Change one layer per cycle
If you change the aura, the pet, the group, and the training area in the same cycle, you cannot tell which one improved the result. Change one layer, run a cycle, and compare. This is slower in the short term and faster over several cycles.
Boost Stacking Pitfalls
| Mistake | Why it hurts | Better approach |
|---|---|---|
| Treating the group bonus as a coordination bonus | The bonus is membership-based | Join the group, do not chase other players |
| Keeping a pet unequipped | The multiplier does not apply | Confirm the active state |
| Assuming a universal level 160 | The reported case is the fifth rebirth | Read the live panel |
| Treating an aura as a level system | Auras are multipliers, not level systems | Compare the current multiplier |
| Resetting without a rebuild plan | The next cycle stalls | Keep a reserve and a target stage |
| Measuring clicks instead of time | The cycle can feel busy without improving | Record cycle length and Chakra |
| Copying an old chart | Values can change with updates | Build your own dashboard |
Recheck Each Multiplier After a Patch
The official listing was updated on October 30, 2026. Community footage from October 29, 2026 may already be outdated. Before a major cycle, read the live aura, pet, group, and rebirth displays. That habit matters more than memorizing any percentage. That habit matters more than any single number copied from an older guide or a community summary.
Signs the Multiplier Stack Is Working
A strong loop is repeatable. You know which layers are active, which stage you will farm after a reset, and how long the rebuild takes. The multiplier is part of the result, but the routine is what makes it usable. If the result does not repeat, revert the change and test a different lever instead of spending more resources.
| Sign | Passing result | If it fails |
|---|---|---|
| Layers active | Aura, pet, and group are confirmed | Check each panel |
| Cycle time | Each cycle is equal or shorter | Find the missing layer |
| Rebuild plan | You know the first stage after a reset | Choose a clearable stage |
| Requirement | The live panel shows eligibility | Continue training |
| Cost | You can pay without emptying the balance | Farm before resetting |
The rebirth guide covers the reset rules, and the rebirth training spots guide covers route selection. Use them together with your own dashboard rather than relying on a single copied chart. The goal is a repeatable result, not a perfect run that cannot be reproduced on the next attempt.
Frequently Asked Questions
What is the best rebirth boost in +1 Anime Eyes?
The strongest practical setup combines every confirmed layer you can activate: an aura, an equipped pet, group membership, and the permanent rebirth multiplier. Exact percentages are not published, so measure a fixed session before and after each change rather than assuming a universal formula.
Does the group bonus depend on other players?
No. The reported +10% Chakra bonus is tied to joining the Bando Interactive group. It is membership-based, not a coordination bonus. Do not plan around group size, shared zones, or other players. A short written record also makes it easier to notice when a patch changes the behavior you measured.
Does an aura stack with rebirth bonuses?
Community footage indicates that aura and rebirth multipliers can affect the same Chakra gain. The exact combination is not published, so test the live interface and compare measured results. Change one layer at a time so you can tell which one helped.
What level is needed for rebirth?
The live rebirth panel shows the current requirement. Community coverage reports level 160 specifically for the fifth rebirth, not as a universal threshold. Use the displayed value for your account instead of copying a fixed chart. Compare the new result with the old one before buying anything else, because a single change is easier to judge.
How do I make a rebirth loop faster?
Activate every confirmed layer before training, use a fixed-session measurement, keep a rebuild reserve, and record the cycle time. Change one layer per cycle. A larger multiplier helps only if it shortens the time from reset to the next requirement. This keeps the advice useful even after a balance update changes a price, a requirement, or a displayed multiplier.